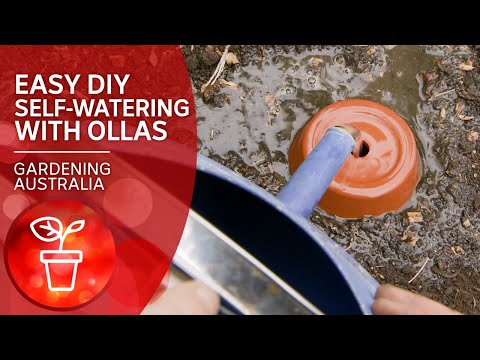
Irrigate like it’s 2000 BC with these easy DIY terracotta watering pots called ollas
Make an Olla (pronounced oi-ya)
Ollas have been used for thousands of years in agriculture and gardening practices and are traditionally unglazed terracotta “jugs” filled with water and buried into the soil, with their necks protruding slightly. Once the porous terracotta olla is in contact with the soil, water begins to seep into the surrounding soil, directly to the rootzone of surrounding plants. The amount of water drawn from the olla varies depending on the soil moisture – dry soil will draw water faster; wet soil slows it down.
This is great in our dry, hot climate – there’s no water wastage through run-off and evaporation, the water goes exactly where it’s needed, and the risk of fungal issues on foliage is significantly reduced due to the foliage not being wet during a watering. The burying of the olla in the soil also promotes deeper roots systems that are better able to manage fluctuations in heat. Perfect! Ollas are brilliant in pots, garden beds and even adjacent to plantings of young trees, but they do have their downsides – traditional olla’s are hard to come by, don’t last forever and are prohibitively expensive. Luckily, there’s an easy way to make them yourself for next to nothing.
What you Need
Two equal sized unglazed terracotta pots. (Tino used 13cm which holds about 3lt of water when full
One tube of weatherproof silicone sealer. (Use a food-safe grade silicone for water tanks and indoor plumbing.)
Plastic milk bottle (or similar), cut to a disc to fit over bottom pot drainage hole. (This doesn’t need to be plastic, but needs to adhere and form a perfect seal with the silicone.)
What to Do
Using a plastic disc, seal the drainage hole on the bottom of ONE of the pots, inside and out to prevent leaks
Pipe some silicone around the rim of this pot, and then place pots on top of each other, making sure the rims meet and line up. Gently pipe silicone around the join and smooth around the seam
Allow around 24 hours for the silicone to cure and dry, and then test your olla for leaks by filling it with water…..
How to Install
Bury the olla in the pot or garden bed, leaving just a couple of centimetres and the open hole exposed. Its important to pack gently pack soil around the olla. Water will not disperse in air pockets and roots will not grow in air pockets.
Fill with water (use shower warm up water, rainwater, potable water) and cover the small opening with a saucer, stone or similar – this will stop the olla getting rubbish, mulch and mosquitoes inside.
The size of your cheap and cheerful olla will determine how far the olla will water – the smaller the olla, the less distance the water will spread. In good soils, expect the water to spread at least the width of the olla in all directions.
Keep an eye on the water level inside the olla, and depending on the weather, the soil and the size of your olla, expect to refill it every few days to a week.
Olla irrigation is brilliant in pots, so consider bunging it into the middle of your planter next time you replace your crops, and drop your seedlings in around them. Olla irrigation is most efficient for crops with fibrous root systems like squash, melons, watermelons, tomatoes, and chilies, but it can work well for establishing young trees. Bear in mind that tree roots can, over time, damage and even crack an olla, so keep an eye on them if they are emptying too quickly.
Speaking of emptying, is there an easy way to tell if your olla is empty? Well, yes and no – some canny crafty folks may use a float installed inside the olla with a flag out the top so they can tell easily (and from a distance) when their ollas need a refill. The less crafty amongst us can use an old wooden chopstick or skinny bamboo stake to see exactly where the water level is up to – or just have a good old look!
Ollas can be made in just about any size imaginable – from small to quite substantial. While there is some growing space taken up in pots and beds by the olla, the long-term benefits to plant and soil health through consistent watering is worth the sacrifice. A tip – make sure that the pots you buy to make your olla aren’t sealed…..the water needs to be able to leach out.
Take Home
Ollas are adaptable, portable and sustainable, and are a pretty good way to keep you soil healthy and your plants happy, especially your precious potted pretties or incredible edibles. And, as they say, everything old is new again – give this ancient irrigation technique a run at your place.
Watch Gardening Australia on ABC iview: http://iview.abc.net.au/programs/gardening-australia
SUBSCRIBE: http://ab.co/GardeningYouTube
This is an official Australian Broadcasting Corporation YouTube channel.
********
Contributions may be removed if they violate ABC’s Online Conditions of Use http://www.abc.net.au/conditions.htm (Section 3).


