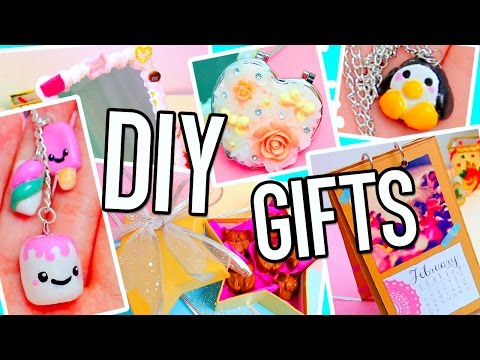
DIY Gifts Ideas! Cute & cheap presents: for BFF, parents, boyfriend… Valentine’s day/Birthdays
Hey guys! In today’s video I will show you some super cute gift ideas perfect for Christmas or other celebrations like birthdays, anniversaries….
Cute clay accessories:
Ingredients: cornstarch (Maizena), white glue, oil (olive or other), vaseline or petrolium jelly. Acrylic paint or nail polish to paint, and some wire and chain or similar depending on which accessory you want to make.
Star off mixing two teaspoons of cornstarch with two teaspoons of white glue, a tiny bit of olive oil and a tiny bit of vaseline. Mix it well until it has this sticky consistency. Heat it in a pot with hot water and stir well. It will take like 5 minutes for it to harden and stick to the spoon and that’s the moment when you take it out!
Knead it with your hands until it cools down and start shaping any accessories you want. If it’s the first time you’re making these accessories, try to keep them simple. Here, I’m making a little penguin, and a little popsicle. Then, take a piece of wire, twist it like so to make a little hook and place it onto your accessory so you can hang it later. Leave them dry for three days.
Now, it’s time to paint them. You can use acrylic paint or nail polish for this. Use a small brush, obviously and you can use a marker or a toothpick for the details. Use some clear nail polish to protect the design and let it dry.
I also made a couple more designs with the leftover clay and using jump ring, I made a necklace with the penguin and a keychain with the other charms!
I think this gift is really easy to personalize and there are tons of designs you can make.
Photo calendar:
For the second gift, start printing any calendar design you want, I’m using this one:
https://scrappystickyinkymess.wordpress.com/2015/06/16/2016-calendar-horizontal-for-a-change/
cut it out and also print and cut some pictures of the same size.
You will also need, 12 pieces of cardstock and 2 slightly bigger pieces of cardboard. The size is up to you but make sure the calendar pages and the pictures fit well. Glue the calendar pages and the pictures to the cardboard, like so, until you get every single month of the year. You can also decorate the pages with some washi tape, stickers or anything you want. Also, decorate one of the cardboard pages to make a cover, for example, I glued a picture and added some stickers but you can make any design you want.
Punch some holes and use the first page you make as a guide to make sure all pages have the holes at the same place.
Put the calendar together, with the cover first and place some book rings on the holes. And your calendar will be finished.
As you see it stays up really nicely, so it’s perfect to have it on your desk or side table.
Decoden mirrors:
The third gift, it’s for all the girly girls out there. You will need a pocket mirror, some cabochons, some white silicone caulk and a piping bag.
So basically, just decorate the mirror lid with the silicone and the piping bag, as it was icing and then place some cabochons here and there making any design you want. I also used some pearls and placed some rhinestones with the help of some tweezers.
You can use the same technique to decorate a bigger mirror like this, or even a frame and place a picture of your friend inside.
Easy chocolates:
For the last gift idea you will need a mold (MINE IS FROM FNAC). So melt some chocolate in the microwave and place a tiny bit in each hole of the mold. Then, swirl it around so the chocolate covers all the surface. Keep it in the freezer for 3 minutes until it dries. In the meantime prepare all the ingredients you want to use for the filling. You can use some pistachios, raisins, walnuts even some strawberry jam or you can take a couple of oreo cookies, crush them, add a little bit of cream cheese and mix it until it is well combined and it creates a paste. Now, use all your ingredients to fill the chocolates. Finally pour a little more chocolate and gently tap them like so to remove any air bubbles.
Keep them for 5 minutes on the freezer and then take them out of the mold. For the gift box, I chose a star shaped one, I wrapped the chocolates in some tissue paper and place them carefully inside the box. Decorate the box with a cute bow and your gift is finished.
This gifts is perfect for absolutely anyone, for your boyfriend, for your parents and make sure to personalize the ingredients so they like the chocolates.
Music: Tobu “Hope”,
Song deep blue by K-391, check him out here:
http://www.youtube.com/user/TheK391
https://www.facebook.com/TheK391
and Youtube’s library
Overlays by Gabrielle Marie at: https://www.youtube.com/user/GlamSolutions
Now I have a P.O. box (don’t write DIYlover or anything just this):
APARTADO DE CORREOS 3017
20002 DONOSTIA (GIPUZKOA)
SPAIN
More DIYlover at:
Twitter: https://twitter.com/DIYlover89
Instagram: http://instagram.com/diylover89
Tumblr: http://diylover89.tumblr.com/


